Issue Preview for Jira is easy to use, both for administrators and for users. You just have to configure which fields you want to see in the hover, and that's it!
Instructions
You can add all of the lists Jira provides by default, or you can add custom fields.
Setting up the list of fields
Go to Jira Administration → Manage apps → Issue Preview Configuration.
You can easily create, edit, delete configurations, or reorder fields in this administrative screen.
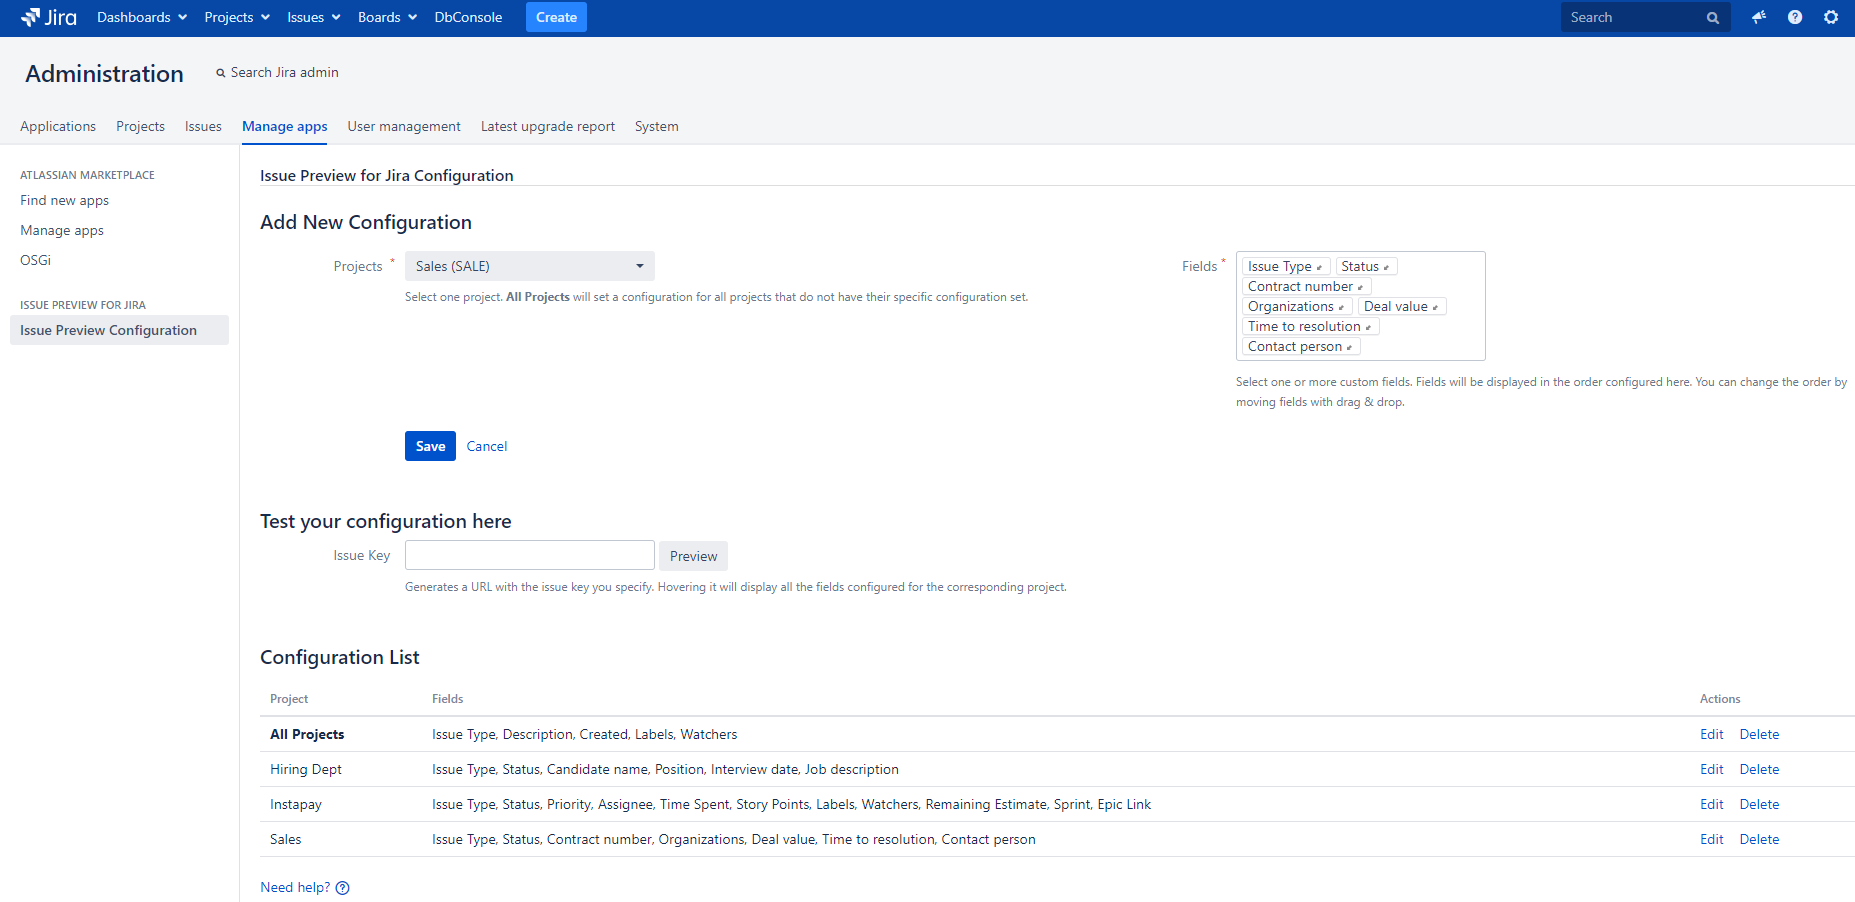
Be reminded that the order of fields is configurable. You can change the order of the fields with drag and drop, or you can add new fields at the end of the list.
Available Fields
We support a large variety of fields, including fields from Jira Software, Jira Service Desk, scripted and custom fields.
Default Settings
We recommend the first thing you do is to set the default fields. For every projects that do not have a specific configuration, the default list of fields will be displayed.
Project Specific Settings
You can have as many project specific configuration as you want. Just select a project and populate the list of fields.
If you delete a project configuration, the default configuration will be displayed.
Preview
After you finished your configuration, you can preview any hover you want. Put a valid Issue Key and click on Preview to get a URL to that issue. Hover it to see the fields you selected.
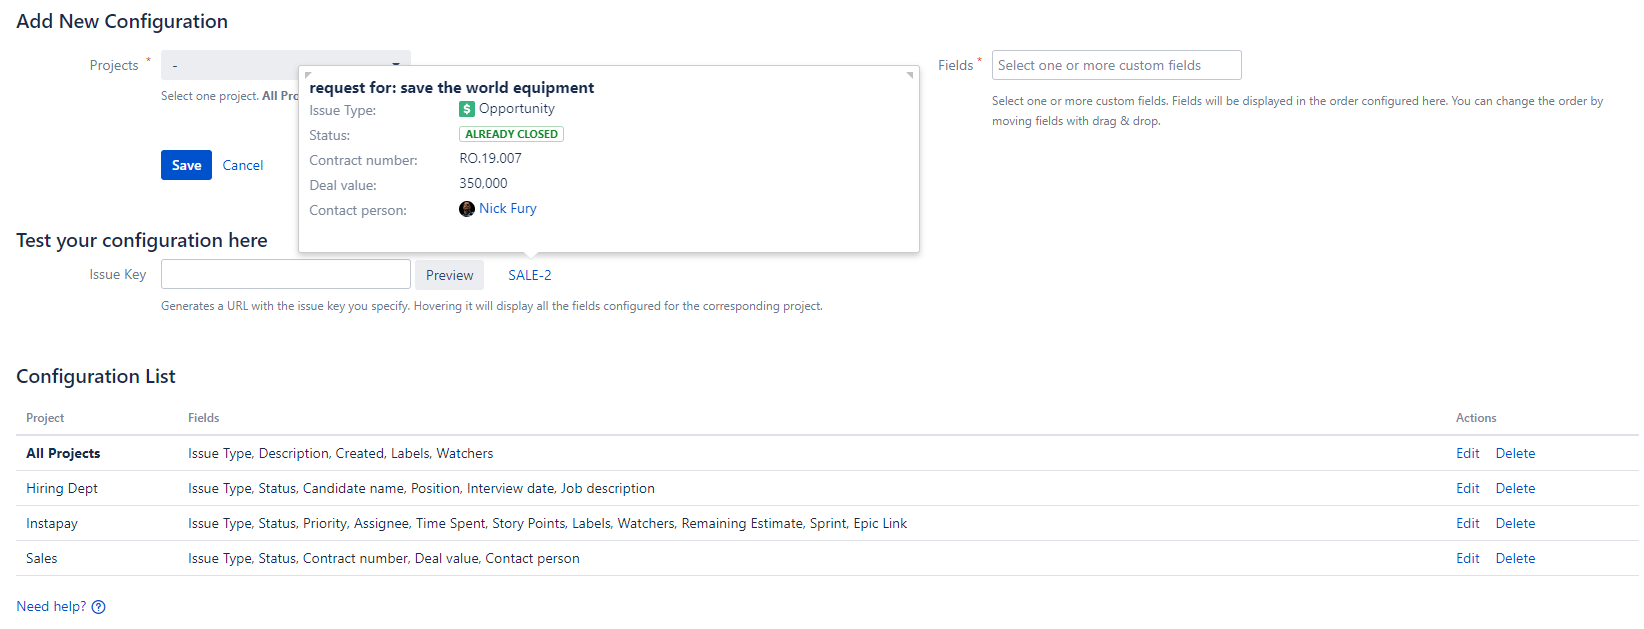
Viewing fields
A popup will show if you hover a URL of a project for more than 2 seconds. After leaving the popup, it will disappear in a short time.
The hover is scroll-able and re-sizeable, so you can view as many fields as you want.